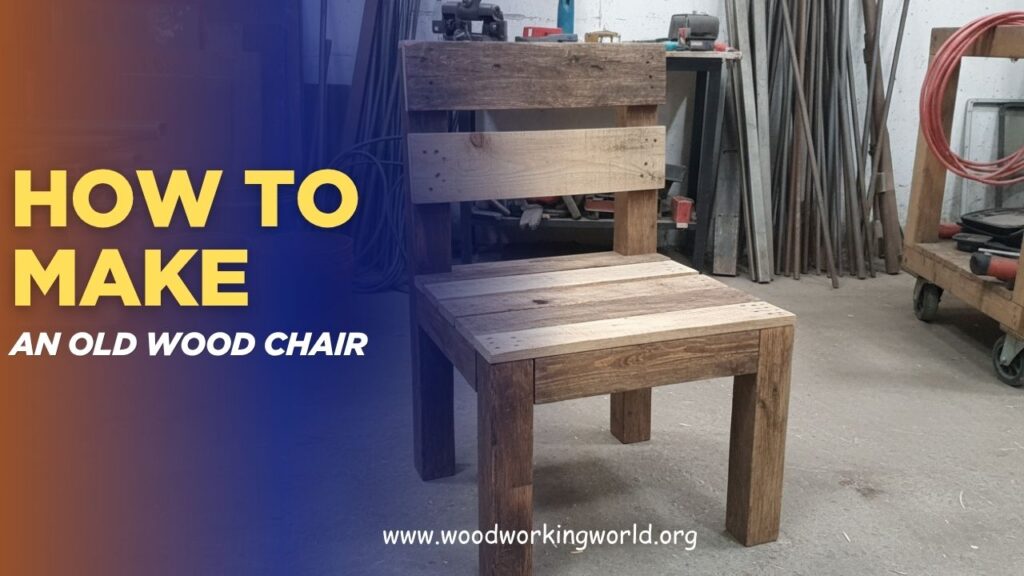
How to Make an Old Wood Chair
Looking at an old wooden chair that seems past its prime? While it may appear worn, scratched, or outdated, an aging wood chair still holds plenty of potential. With a little effort and the right techniques, you can restore its charm and bring it back to life instead of throwing it away.
In this complete guide on how to make an old wood chair, we’ll cover essential steps such as cleaning, repairing damage, sanding, refinishing, and applying protective finishes. By the end, you’ll have the knowledge to transform an old chair into a refreshed, durable, and stylish piece for your home.
👉 CLICK HERE to Unlock 16,000+ DIY woodworking plans now
Why Build an Old Wood Chair?
Creating an old wood chair offers several benefits:
- Unique Aesthetic: Weathered wood, distressed finishes, and vintage designs give your chair a one-of-a-kind look.
- Sustainability: Using reclaimed wood reduces waste and adds character from previous life cycles.
- Skill Development: Learn essential woodworking skills including joinery, sanding, finishing, and design.
- Functional Art: A well-made chair is both beautiful and practical for everyday use.
- Customization: You control size, shape, and finish to fit your décor perfectly.
Every chair tells a story—whether reclaimed or handcrafted from new wood, it becomes a functional piece of art.
👉 CLICK HERE to Unlock 16,000+ DIY woodworking plans now
Materials Needed
To build an old wood chair, gather the following:
- Wood: Solid hardwood like oak, maple, or walnut, or reclaimed wood for a rustic feel.
- Wood Glue: For reinforced joints.
- Screws/Nails: 1–2” finishing nails or wood screws.
- Sandpaper: Medium (120 grit) and fine (220 grit).
- Saw: Hand saw, jigsaw, or circular saw.
- Chisel & Mallet: For joinery and detailed adjustments.
- Clamps: Essential for holding pieces in place while glue dries.
- Stain, Paint, or Varnish: To achieve an antique finish.
- Protective Finish: Polyurethane, tung oil, or wax for durability.
Pro Tip: Inspect reclaimed wood for nails, cracks, and rot before use to ensure safety and quality.
Step 1: Plan Your Chair Design
Planning is crucial for comfort, durability, and aesthetics:
- Seat: Rectangular or square, decide on width, depth, and height (standard seat height: 17–19 inches).
- Backrest: Straight, angled, or slatted for ergonomic support.
- Legs: Four sturdy legs, optionally tapered for a vintage look.
- Cross Supports: Horizontal braces connecting legs for stability.
Sketch your design on paper or cardboard. Include dimensions, angles, and joinery points. Proper planning avoids mistakes and ensures a balanced, functional chair.
Step 2: Prepare and Cut Wood
- Select Boards: Choose wood that is straight and free of major defects.
- Remove Debris: Sand rough surfaces and remove any old nails or screws from reclaimed wood.
- Cut Pieces: Use a saw to cut seat, backrest, legs, and braces according to your plan.
- Sand Edges: Smooth edges and corners to prevent splinters.
Accurate cutting and preparation are essential for a chair that is both stable and visually appealing.
Step 3: Assemble the Chair Frame
- Attach Legs to Seat: Apply wood glue and secure with screws or nails.
- Install Cross Supports: Horizontal braces between legs prevent wobbling.
- Attach Backrest: Align carefully, angle for comfort, and secure with glue and screws.
- Check Alignment: Use clamps and a square to ensure everything is level and square.
Pro Tip: Pre-drill holes before inserting screws to prevent splitting, especially in hardwoods or reclaimed wood.
Step 4: Distress and Add Old Wood Character
For an authentic old wood look:
- Sand Edges Lightly: Mimic natural wear over time.
- Create Texture: Use a hammer, chain, or wire brush for small dents and scratches.
- Apply Uneven Staining: Slight variations in color create a vintage effect.
- Optional Paint Wash: Chalk or milk paint applied lightly and sanded back enhances the antique feel.
The key is subtle imperfections that make the chair appear naturally aged.
Step 5: Sand and Smooth Surfaces
- Use medium-grit sandpaper (120) to remove rough patches.
- Finish with fine-grit sandpaper (220) for a smooth touch.
- Round sharp edges and corners for safety and comfort.
Sanding enhances both safety and appearance, ensuring the chair is comfortable to use.
Step 6: Apply Finish
Staining or Painting
- Stain: Brings out wood grain; dark tones add depth and vintage character.
- Paint: Light chalk or milk paint creates a soft, antique look.
- Apply multiple thin layers, sanding lightly between coats.
Protective Finish
- Polyurethane: Durable, water-resistant, and protects against wear.
- Tung or Linseed Oil: Penetrates wood for a natural, rich finish.
- Wax: Adds a soft sheen and enhances aged look.
Finishing protects the chair while emphasizing the rustic beauty of the wood.
Step 7: Final Assembly and Inspection
- Tighten all screws and reinforce glued joints if needed.
- Test stability and balance; minor adjustments now prevent future wobbling.
- Ensure all surfaces are smooth and safe for everyday use.
A careful final inspection ensures your chair is both functional and durable.


Maintenance Tips
- Regular Cleaning: Wipe with a soft, dry cloth; avoid harsh chemicals.
- Periodic Oil or Wax Application: Keeps wood nourished and prevents drying or cracking.
- Avoid Excess Moisture: Prevent warping by keeping the chair dry.
- Check Joints: Tighten screws and re-glue as needed to maintain stability.
Routine maintenance keeps your old wood chair looking authentic and lasting for decades.
FAQs: Making an Old Wood Chair
1. Can I use reclaimed wood?
Yes, reclaimed wood adds character. Ensure it’s clean, dry, and free of contaminants.
2. How do I prevent the chair from wobbling?
Install cross braces and pre-drill screw holes for stronger joints.
3. Can I create a curved backrest?
Yes, use thin slats or steam bending for advanced designs.
4. What finish gives the best antique look?
A combination of stain, light distressing, and wax works best for vintage aesthetics.
5. How long does it take to make a chair?
For a simple design, 4–8 hours; more intricate designs may require longer.
Common Mistakes to Avoid
❌ Using soft, weak wood for legs or seat.
❌ Skipping cross supports or braces.
❌ Over-sanding and removing natural character.
❌ Applying thick finishes that hide wood grain.
❌ Neglecting pre-drilled holes, leading to splitting.
Avoiding these mistakes ensures your chair is sturdy, comfortable, and visually appealing.
Bonus Tips for Authenticity
- Mix Different Woods: Creates a rustic, patchwork charm.
- Distress Selectively: Focus on high-contact areas, not structural points.
- Decorative Touches: Carve simple patterns or add vintage hardware for personality.
- Color Wash: Subtle fades and washes enhance antique appeal.
Small creative touches make your chair stand out as a unique centerpiece.
👉 CLICK HERE to Unlock 16,000+ DIY woodworking plans now
Final Verdict: Build a Timeless Piece
Making an old wood chair is more than woodworking—it’s about storytelling through furniture. By combining careful planning, strong joinery, and authentic finishes, you can create a chair that is both functional and visually striking.
Key Takeaways:
- Choose solid or reclaimed wood with character.
- Reinforce joints with glue and cross braces for stability.
- Sand, distress, and finish carefully to achieve an antique look.
- Maintain periodically to preserve both function and appearance.
- Embrace imperfections—they give charm and authenticity.
👉 CLICK HERE to Unlock 16,000+ DIY woodworking plans now
