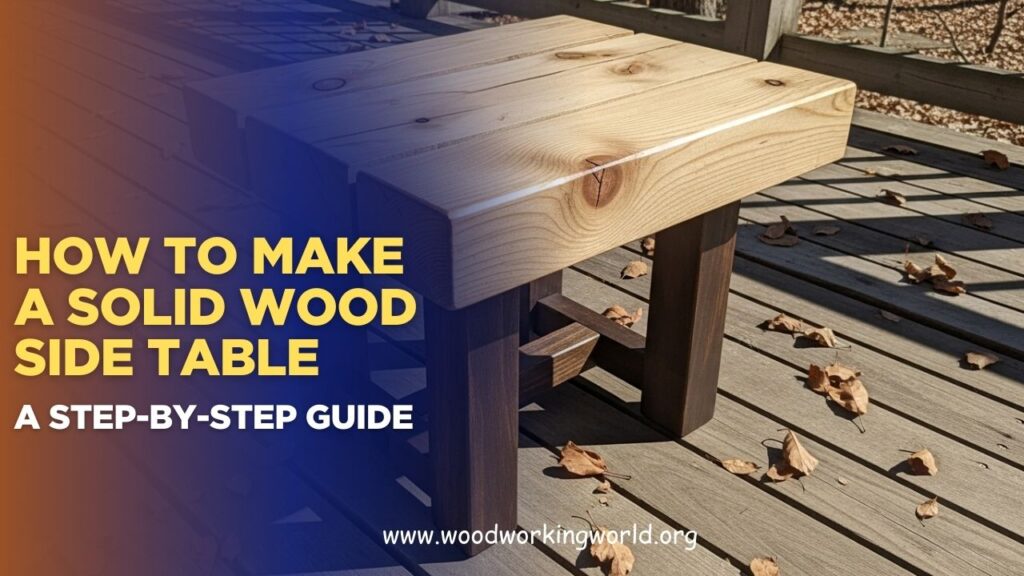
How to Make a Solid Wood Side Table: A Step-by-Step Guide
Building a solid wood side table is a rewarding project that combines functionality, craftsmanship, and personal style. A well-constructed side table not only enhances your living space but also provides a durable piece of furniture that can last for years.
In this step-by-step guide on how to make a solid wood side table, we’ll walk you through selecting the right materials, essential tools, construction techniques, finishing tips, and common pitfalls to avoid—helping you create a sturdy, beautiful table you’ll be proud to use and display.
👉 CLICK HERE to Unlock 16,000+ DIY woodworking plans now
Why Build Your Own Side Table?
Building your own solid wood side table offers several advantages:
- Customization: Choose dimensions, wood species, and finishes that match your décor.
- Quality: Solid wood is more durable and long-lasting than particleboard or MDF.
- Skill-Building: Practice essential woodworking techniques like joinery, sanding, and finishing.
- Cost-Effective: DIY can be less expensive than buying high-quality furniture.
Think of this project as both a practical addition to your home and a creative woodworking challenge.
👉 CLICK HERE to Unlock 16,000+ DIY woodworking plans now
Tools and Materials Needed
Tools:
- Table saw or circular saw
- Miter saw
- Drill and screwdriver
- Clamps
- Orbital sander or sanding block
- Measuring tape, square, and pencil
Materials:
- Hardwood boards (oak, maple, or walnut) for durability
- Wood glue
- Screws or wood joinery hardware
- Wood stain or finish of your choice
- Sandpaper (120–220 grit)
- Optional: wood filler for imperfections
Pro Tip: Always measure twice and cut once to ensure accurate, clean cuts.
Step 1: Plan Your Side Table Dimensions
Before cutting, decide the size of your side table:
- Height: 22–26 inches (matches standard sofa or chair height)
- Width & Depth: 16–24 inches (compact enough for small spaces but functional)
- Top Thickness: 1–1.5 inches for stability and durability
Sketch your design including legs, tabletop, and optional shelf. A clear plan prevents mistakes and ensures all pieces fit perfectly.
Step 2: Cut the Wood to Size
- Top Board: Cut to your desired width and depth.
- Legs: Standard height for a side table is 22–26 inches. Ensure all four legs are equal.
- Aprons (optional): Small boards connecting legs for added stability, typically 2–4 inches in height.
- Optional Shelf: Cut to slightly smaller dimensions than the tabletop, allowing for clearance.
Pro Tip: Use a miter saw for precise leg and apron cuts.
Step 3: Sand the Pieces
- Start with 120-grit sandpaper to remove rough edges and splinters.
- Progress to 220-grit for a smooth finish.
- Pay special attention to corners and edges to prevent rough spots.
Pro Tip: Sand in the direction of the wood grain to maintain a professional look.
Step 4: Assemble the Frame
- Attach Aprons to Legs: Use wood glue and screws or pocket-hole joinery. Ensure a square frame using a carpenter’s square.
- Optional Shelf: If including a lower shelf, attach it to the aprons using wood glue and screws.
- Clamp Securely: Let glue dry for at least 30–60 minutes before moving to the next step.
Pro Tip: Pre-drill screw holes to prevent splitting the wood.
Step 5: Attach the Tabletop
- Place the tabletop on a flat surface with the finished side down.
- Position the frame on top and center it carefully.
- Secure with wood screws or fasteners from the underside, leaving room for wood expansion.
Pro Tip: Use screw slots or figure-eight fasteners to allow for wood movement and prevent cracking.
Step 6: Fill Imperfections and Sand Again
- Use wood filler to cover gaps, knots, or screw holes.
- Sand lightly with 220-grit sandpaper after the filler dries.
- Ensure all surfaces are smooth and edges are rounded for a professional finish.
Step 7: Apply Finish
- Choose a Finish:
- Stain + Polyurethane: Enhances wood grain and adds durability
- Oil Finish (linseed or tung): Natural look with moderate protection
- Paint: For a bold, colorful accent
- Application Tips:
- Apply thin, even coats
- Sand lightly between coats for smoothness
- Allow proper drying time according to the manufacturer’s instructions
Pro Tip: Apply finish in a well-ventilated area and use a lint-free cloth or foam brush for the best results.
Step 8: Optional Customizations
- Drawer Addition: Add a small drawer for storage using slides or wooden runners.
- Metal Accents: Attach metal legs or brackets for an industrial look.
- Decorative Carvings: Add patterns or wood-burning designs for a unique style.
- Floating Shelf: Incorporate a lower shelf for books, magazines, or décor.
Customizations allow you to personalize your side table and match your home’s style perfectly.


Common Mistakes to Avoid
❌ Not measuring accurately — leads to uneven table and legs
❌ Skipping sanding — rough edges can splinter and reduce finish quality
❌ Using insufficient glue or clamps — reduces stability
❌ Attaching the tabletop without allowing wood movement — causes warping
❌ Rushing the finish — can result in blotches, uneven coating, or peeling
Avoiding these mistakes ensures a professional-quality side table.
FAQs: Building a Solid Wood Side Table
1. How long does it take to build a side table?
- Simple designs: 3–5 hours
- More complex tables with drawers or shelves: 6–10 hours
2. Can I use softwood instead of hardwood?
- Yes, but hardwoods like oak, maple, or walnut are more durable for long-term use.
3. Do I need advanced tools?
- Basic hand tools can work, but power tools like a table saw, miter saw, and drill make the process faster and more precise.
4. How do I prevent tabletop warping?
- Leave expansion gaps when attaching the frame and use quality wood with minimal moisture content.
5. Can this table be used outdoors?
- Yes, if you use weather-resistant wood (cedar, teak) and apply an exterior-grade finish.
👉 CLICK HERE to Unlock 16,000+ DIY woodworking plans now
Final Verdict: Build Your Own Stylish Side Table
A solid wood side table is a practical and rewarding woodworking project. By following proper dimensions, accurate cuts, careful assembly, and finishing techniques, you can create a beautiful, functional, and durable piece that enhances any room.
Key Takeaways:
✔ Plan your dimensions to match your space
✔ Sand carefully and prep wood before assembly
✔ Use clamps and glue for sturdy joints
✔ Apply quality finishes for durability and beauty
✔ Customize with drawers, shelves, or decorative accents
Pro Tip: Combine this project with detailed woodworking plans to simplify the process and achieve professional results even as a beginner.
👉 CLICK HERE to Unlock 16,000+ DIY woodworking plans now
