Time Management Tips for Completing Ted’s Woodworking Projects on Schedule
One of the biggest joys of woodworking is watching raw lumber transform into a beautiful piece of furniture with your own hands. But if you’ve ever started a project that ended up gathering dust in the garage, you’re not alone. Many DIYers struggle with time management — projects that were supposed to take a weekend can drag on for weeks or even months.
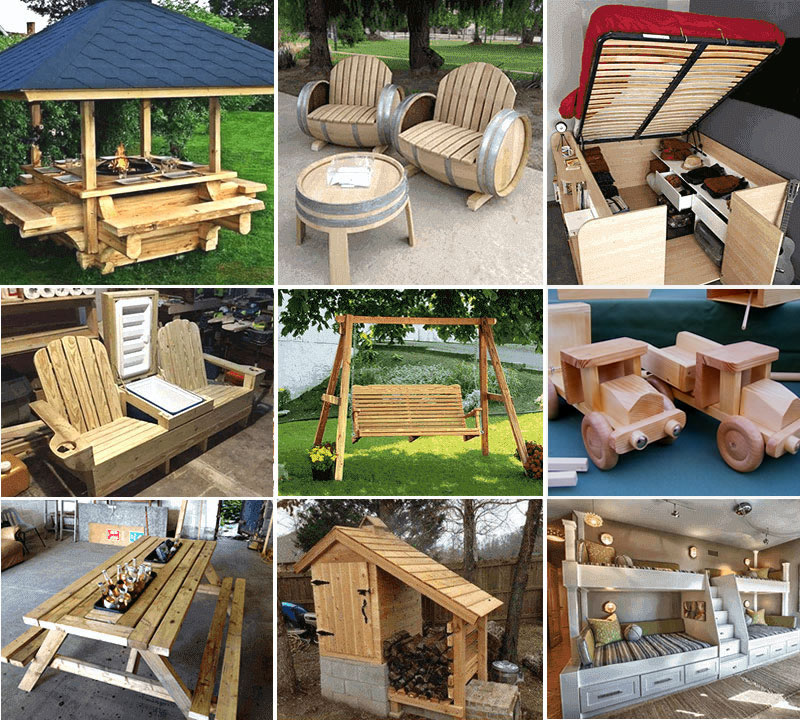
That’s where proper planning, organization, and a few smart time management strategies make all the difference. And if you’re using Ted’s Woodworking Plans, you already have a head start. With 16,000+ detailed projects, complete with step-by-step instructions, material lists, and diagrams, the guesswork is removed. But even the best plan won’t save you if you can’t manage your time effectively.

👉 Want instant access to 16,000+ step-by-step blueprints? Get Ted’s Woodworking Plans here.
Why Time Management Matters in Woodworking
Time isn’t just about finishing fast — it’s about working smarter and ensuring quality. Here’s why good time management is critical:
- Avoiding Frustration: Long, drawn-out projects can sap motivation.
- Consistency: Regular work sessions help you stay sharp and avoid mistakes.
- Resource Efficiency: Proper scheduling prevents wasted materials and repeat cuts.
- Safety: Rushing at the last minute can lead to accidents with tools.
- Satisfaction: Finishing on time feels rewarding and motivates you to start the next project.
Without time management, even the best plans can turn into half-finished pieces that never see the light of day.
Step 1: Choose Projects That Fit Your Timeframe
The first step in managing your time is being realistic about your availability. Not every project is meant to be completed in a single weekend.
- Beginner-Friendly Projects (1–3 days): Coffee tables, small bookshelves, storage benches.
- Intermediate Projects (1–2 weeks): Dining tables, bed frames, outdoor patio sets.
- Advanced Projects (1 month+): Cabinetry, large wardrobes, custom office desks.
Ted’s Woodworking categorizes plans from simple to complex, so you can pick one that matches both your skill level and your schedule.
✅ Pro Tip: Start with smaller projects before committing to a large build. It builds confidence and gives you a feel for how long tasks actually take.
Step 2: Break the Project into Manageable Phases
Looking at an entire woodworking plan can feel overwhelming. The trick is to break it down into bite-sized tasks.
For example, building a dining table can be split into:
- Gathering tools and materials
- Cutting boards to size
- Building the tabletop
- Constructing the base and legs
- Assembling frame and tabletop
- Sanding and finishing
- Applying protective coat
Each of these can be scheduled separately, turning a big project into a series of mini-deadlines.
Ted’s plans make this easier by providing step-by-step instructions — you just have to set time blocks for each phase.
Step 3: Create a Realistic Timeline
Once you’ve broken your project into steps, assign a time estimate to each one.
Example for a coffee table project:
- Day 1: Gather materials & cut lumber (2–3 hours)
- Day 2: Assemble base (2 hours)
- Day 3: Attach top & sand (2–3 hours)
- Day 4: Apply finish & let dry (1–2 hours over multiple sessions)
Notice how each task is realistic and allows drying/curing time. Rushing through finish or glue drying is one of the most common mistakes beginners make.
✅ Pro Tip: Always double your initial time estimate. Woodworking takes longer than you think, especially if you’re new.
Step 4: Prepare Materials and Tools in Advance
One of the biggest time-wasters in woodworking isn’t cutting or assembling — it’s searching for missing tools or running back to the hardware store.
Before you start:
- Use Ted’s material list to buy everything in one trip.
- Lay out tools neatly in your workspace.
- Pre-mark and pre-cut scrap wood for testing cuts and finishes.
- Make sure blades are sharp and batteries are charged.
Spending an extra hour preparing can save you multiple hours of frustration later.
👉 Want instant access to 16,000+ step-by-step blueprints? Get Ted’s Woodworking Plans here.
Step 5: Master the “One Hour Rule”
Even if you have a busy schedule, you can still complete projects on time by applying the one hour rule:
Commit to spending at least one focused hour per day on your project.
One hour may not seem like much, but it builds momentum. Over a week, that’s 7 hours — enough to complete a medium-sized project.
✅ Use a timer or set a dedicated workshop routine (e.g., after dinner or early morning).
🛠️ Ted’s 16,000 Woodworking Plans – Why You’ll Love It:
- 📚 16,000+ Ready-to-Build Projects – From small crafts to big furniture!
- ✂️ Step-by-Step Instructions – No guesswork, just follow and build.
- 🧰 Perfect for All Levels – Beginner to expert, everyone’s covered.
- 💰 Turn Projects into Profit – Build & sell your creations easily!
- 🔥 Limited-Time Deal – Grab it now at 90% OFF!


Step 6: Stay Organized During the Build
Clutter eats up time. Constantly moving tools or searching for screws slows progress. Keep your workspace organized by:
- Using bins or magnetic trays for screws/nails.
- Keeping tools grouped by function (cutting, measuring, fastening).
- Cleaning sawdust after each session.
- Labeling cut pieces with painter’s tape.
Ted’s diagrams often number parts — match those numbers on your pieces for quick identification.
Step 7: Avoid Multitasking
It’s tempting to jump between multiple woodworking projects, but that’s a recipe for half-finished builds. Focus on one project at a time.
- Finish cutting all pieces before moving to assembly.
- Sand and finish in batches rather than switching tasks.
- Don’t start a new project until the current one is complete.
Single-tasking ensures you maintain steady progress and actually finish what you start.
Step 8: Use Dry Fitting Before Assembly
One hidden time-saver is dry fitting — assembling your project without glue or screws first. This ensures all parts fit properly and prevents time-consuming mistakes.
A few extra minutes here can save hours of disassembly later. Ted’s plans show clear diagrams, making dry fitting even easier.
👉 Want instant access to 16,000+ step-by-step blueprints? Get Ted’s Woodworking Plans here.
Step 9: Account for Drying and Curing Time
Woodworking isn’t just cutting and assembling. Glues, stains, and finishes all need proper drying time. Ignoring this leads to smudges, weak joints, or tacky finishes.
Typical times:
- Wood glue: 30–60 minutes to set, 24 hours for full strength.
- Stain: 6–24 hours before sealing.
- Polyurethane: 24 hours between coats, up to 72 hours before heavy use.
✅ Build these times into your schedule instead of rushing. Use them to work on other small shop tasks (sharpening tools, prepping the next project).
Step 10: Track Your Progress
A simple progress tracker keeps you motivated and on schedule.
Options:
- Checklist of project steps (cross off each as you go).
- Whiteboard timeline in your workshop.
- Apps like Trello or Notion for visual progress tracking.
Every checked box is a small win that pushes you toward completion.
Step 11: Learn to Say “Good Enough”
Perfectionism is the enemy of finishing on time. While attention to detail is important, obsessing over tiny flaws can paralyze progress.
- Slight wood grain differences? Accept them as natural character.
- Minor sanding marks? Usually invisible after finishing.
- Microscopic alignment issues? Don’t delay the project for days.
Remember: woodworking is about craftsmanship, not machine precision. Ted’s plans give you accurate measurements, but small human variations are normal.
Step 12: Plan Your Next Project
One of the best ways to stay on schedule is to always know what’s next.
When you’re nearing the end of one project:
- Browse Ted’s collection for your next build.
- Pick something slightly more challenging to grow your skills.
- Schedule it in advance.
Having momentum reduces the risk of “project fatigue” and keeps you excited to continue.
👉 Want instant access to 16,000+ step-by-step blueprints? Get Ted’s Woodworking Plans here.
Common Time-Wasting Mistakes (and How to Avoid Them)
Even experienced woodworkers fall into traps that kill productivity. Here’s what to watch out for:
- Not reading the full plan first – Always study Ted’s diagrams before starting.
- Frequent hardware store trips – Buy everything in one go.
- Poor workspace lighting – Slows measuring and increases mistakes.
- Rushing cuts – Leads to errors that require rework.
- Overcomplicating finishes – Simple, durable finishes save time and still look great.
Why Ted’s Woodworking Helps You Stay on Schedule
With free internet plans, you often waste time figuring out missing steps or unclear instructions. Ted’s Woodworking eliminates that problem:
- Step-by-step blueprints mean you always know the next step.
- Material & cutting lists prevent last-minute store runs.
- Detailed diagrams save time guessing measurements.
- Variety of projects lets you choose builds that fit your schedule.
The structure alone can shave hours (or days) off your build timeline.
Final Verdict
Completing woodworking projects on schedule doesn’t require rushing — it requires smart planning and time management. By breaking tasks into phases, setting realistic timelines, staying organized, and leveraging Ted’s Woodworking Plans, you’ll be amazed at how much you can accomplish without stress.
- Pick the right-sized project for your available time.
- Break down tasks into clear, achievable steps.
- Stick to consistent work sessions, even just an hour a day.
- Use Ted’s detailed plans to eliminate guesswork.
With these strategies, you’ll not only finish more projects but also enjoy the process without frustration.
👉 Want instant access to 16,000+ step-by-step blueprints? Get Ted’s Woodworking Plans here.