Simple yet effective woodworking butt joints for beginners (Updated 2026)
Looking to build a solid foundation for your woodworking skills? Butt joints are one of the simplest—and most fundamental—techniques every beginner should master. While basic in design, they’re the building blocks for frames, boxes, shelves, and countless other projects. Done correctly, they can be both strong and surprisingly versatile.
In this guide, we’ll introduce simple yet effective woodworking butt joint techniques, share tips for reinforcing them, explore common mistakes to avoid, and most importantly—show how mastering this basic joint can set you up for success in all your woodworking projects.
👉 CLICK HERE to Unlock 16,000+ DIY woodworking plans now
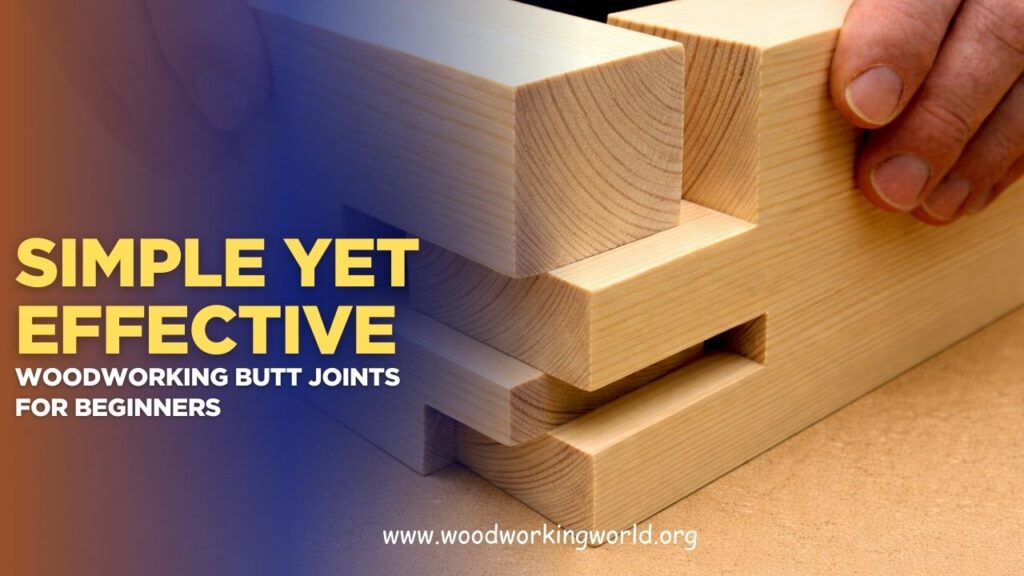
Types of Butt Joints
There are several variations of the basic butt joint, each offering different levels of strength and aesthetics. Below are the most common types:
- Basic Butt Joint – Simply joining two boards with glue or fasteners.
- Reinforced Butt Joint – Uses dowels, biscuits, or pocket hole screws to increase strength.
- Mitered Butt Joint – The ends of the boards are cut at 45 degrees to create a seamless edge.
- Rabbeted Butt Joint – One board has a rabbet cut to provide a larger gluing surface.
- Pocket Hole Butt Joint – Uses pocket hole screws to create a strong and quick joint.
👉 CLICK HERE to Unlock 16,000+ DIY woodworking plans now
Step-by-Step Guide to Making a Butt Joint
Tools and Materials Needed
- Wood pieces to be joined
- Wood glue
- Clamps
- Screws or nails (if required)
- Drill and drill bits
- Wood chisel (for rabbeted joints)
- Pocket hole jig (for pocket hole joints)
- Sandpaper
Step 1: Measure and Cut the Wood
- Ensure both wood pieces are cut to the correct length.
- Use a square or miter saw for precise 90-degree or angled cuts.
Step 2: Prepare the Edges
- Sand the edges to remove any roughness.
- Dry-fit the pieces to ensure they align correctly.
Step 3: Apply Glue
- Use a high-quality wood glue to create a strong bond.
- Spread the glue evenly along the joint’s contact surface.
Step 4: Secure the Joint
- For a simple butt joint, use clamps to hold the pieces together until the glue dries.
- Reinforce with screws or nails if necessary.
- For pocket hole joints, drill angled pocket holes and secure the screws.
Step 5: Allow Drying and Finish
- Let the glue dry completely (as per manufacturer’s recommendations).
- Sand the joint for a smooth finish.
- Apply stain, paint, or sealant as desired.


Comparison Table: Different Butt Joints
| Joint Type | Strength | Complexity | Tools Needed |
|---|---|---|---|
| Basic Butt Joint | Low | Very Easy | Saw, Glue |
| Reinforced Joint | Medium | Easy | Dowels/Biscuits, Drill |
| Mitered Butt Joint | Medium | Moderate | Miter Saw, Glue |
| Rabbeted Butt Joint | Medium-High | Moderate | Chisel, Saw, Glue |
| Pocket Hole Joint | High | Moderate | Pocket Hole Jig, Drill |
Advantages of Butt Joints
Pros:
✔ Simple and easy to learn.
✔ Requires minimal tools.
✔ Ideal for beginner woodworkers.
✔ Works well for basic furniture and frame construction.
Cons:
❌ Weaker than advanced joints.
❌ May require reinforcement for durability.
❌ Not as aesthetically pleasing without proper finishing.
Quote of the Day
“The key to great woodworking is not complexity, but precision.” – Unknown
👉 CLICK HERE to Unlock 16,000+ DIY woodworking plans now
FAQs About Butt Joints
Q1: What is the best way to strengthen a butt joint?
A: Reinforcing a butt joint with dowels, screws, biscuits, or pocket holes can significantly increase its strength.
Q2: Can I use butt joints for heavy furniture?
A: While butt joints alone are not suitable for heavy loads, reinforcing them with additional fasteners or joinery techniques can enhance their durability.
Q3: How long should wood glue dry before removing clamps?
A: Most wood glues require at least 24 hours to fully cure, but clamps can often be removed after 30-60 minutes depending on the glue type.
Q4: What type of glue works best for butt joints?
A: PVA (polyvinyl acetate) wood glue, such as Titebond or Elmer’s Wood Glue, is ideal for butt joints.
Q5: How do I ensure my butt joints are aligned properly?
A: Use clamps and a square to hold the pieces in place while gluing and fastening them together.
Conclusion
Mastering the butt joint is an essential skill for beginner woodworkers. While it may not be the strongest joint, it is easy to create and can be reinforced for added durability. By understanding the different variations and following proper techniques, you can make effective butt joints for your woodworking projects. Start practicing today and enhance your woodworking craftsmanship!
👉 CLICK HERE to Unlock 16,000+ DIY woodworking plans now
