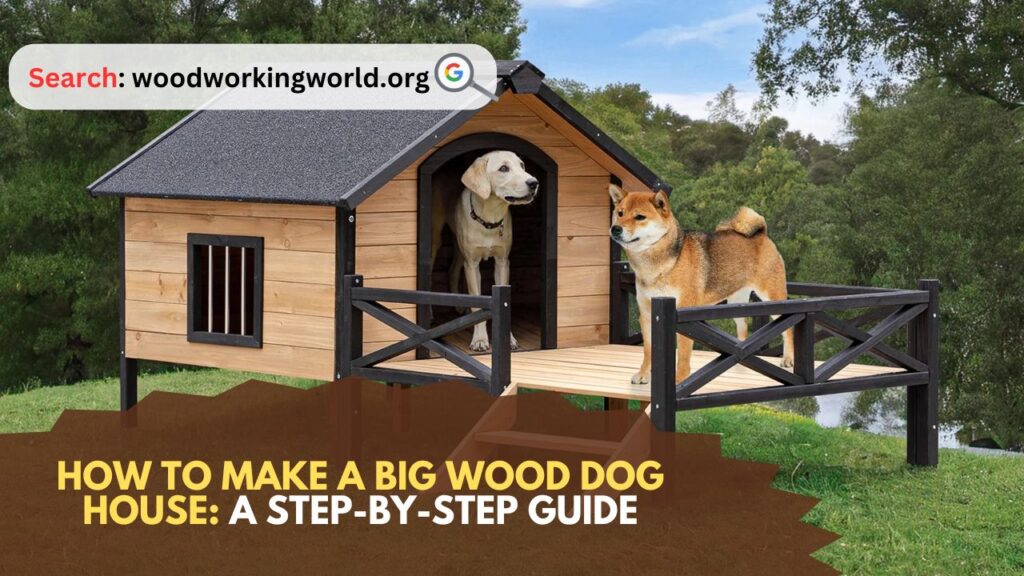
Big Wood Dog House: Building a dog house can be a rewarding project for any dog owner. It provides a comfortable and secure shelter for your furry friend, and a wooden dog house can be customized to fit your pet’s needs and your home’s aesthetics. In this guide, we’ll walk you through the steps to build a big wood dog house, perfect for larger breeds or multiple dogs.
How to Make a Big Wood Dog House
Materials and Tools You’ll Need to Make a Big Wood Dog House
Before you start building, gather the necessary materials and tools:
Materials:
- Plywood sheets (for the floor, walls, and roof)
- 2×4 lumber (for framing)
- 1×2 lumber (for trim)
- Roofing material (shingles or metal sheets)
- Insulation (optional, for added comfort)
- Exterior wood screws
- Wood glue
- Paint or wood stain
- Primer (if painting)
- Weatherproof sealant
Tools:
- Measuring tape
- Circular saw or table saw
- Power drill
- Screwdriver
- Hammer
- Level
- Square
- Paint Brushes or rollers
- Safety goggles and gloves
Step 1: Planning and Designing
Start by determining the size of the dog house. Measure your dog while standing to ensure the house is spacious enough for them to move comfortably. A good rule of thumb is to make the house at least 25% larger than your dog. For a big dog house, the dimensions could be around 48 inches long, 32 inches wide, and 40 inches high.
Sketch a simple design for the dog house, including the floor, walls, roof, and entrance. Decide if you want a flat or sloped roof. A sloped roof is better for rain and snow runoff, while a flat roof can double as a sunbathing spot for your dog.
Step 2: Building the Floor
- Cut the Plywood:
- Cut a piece of plywood to the dimensions of your dog house floor (48×32 inches). This will serve as the base.
- Frame the Floor:
- Cut 2×4 lumber into four pieces: two pieces 48 inches long and two pieces 29 inches long. These will form the frame.
- Assemble the frame by attaching the 48-inch pieces to the 29-inch pieces, creating a rectangle. Use wood screws and wood glue for a strong bond.
- Attach the plywood to the frame using screws, ensuring it’s secure and flat.
Step 3: Constructing the Walls
- Cut the Wall Panels:
- Cut four pieces of plywood for the walls: two pieces 48×40 inches (front and back) and two pieces 32×40 inches (sides).
- Create the Entrance:
- On one of the 48×40 inch pieces, mark and cut out the entrance. The entrance should be large enough for your dog to enter comfortably, typically around 14 inches wide and 20 inches high. Use a jigsaw to cut out the shape.
- Frame the Walls:
- Cut 2×4 lumber for the wall frames: four pieces 48 inches long and four pieces 32 inches long.
- Attach the lumber to the plywood panels, creating frames for the front, back, and sides. Secure with wood screws and glue.
- Assemble the Walls:
- Attach the side walls to the floor frame using wood screws. Ensure they are level and square.
- Attach the front and back walls to the side walls and floor. Use screws and a level to ensure everything is straight.
Step 4: Building the Roof
- Cut the Roof Panels:
- Cut two pieces of plywood for the roof. If you’re making a sloped roof, cut one piece 52×36 inches (for the lower side) and one piece 48×36 inches (for the higher side).
- Frame the Roof:
- Cut 2×4 lumber for the roof frame. The length will depend on whether your roof is sloped or flat.
- Assemble the roof frame using screws and wood glue.
- Attach the Roof:
- Secure the roof panels to the frame. For a sloped roof, ensure the longer panel overlaps the shorter one to facilitate water runoff.
Step 5: Adding Finishing Touches
- Insulation (Optional):
- If you live in a region with extreme temperatures, consider adding insulation to the walls and roof. Use foam insulation panels and attach them inside the wall and roof frames before securing the interior plywood panels.
- Trim and Weatherproofing:
- Use 1×2 lumber to create trim around the edges of the roof and walls for a polished look. Attach the trim using finishing nails.
- Apply a weatherproof sealant to all joints and edges to protect against moisture.
- Painting or Staining:
- Apply primer to the exterior of the dog house. Once dry, paint or stain the dog house in your desired color. Use exterior-grade paint or stain to ensure durability.
- Allow the paint or stain to dry completely before applying a second coat if needed.
Step 6: Roofing
- Attach Roofing Material:
- Choose a roofing material that suits your climate and aesthetic preference. Asphalt shingles or metal sheets are good options.
- If using shingles, start from the bottom edge and work your way up, overlapping each row to prevent leaks. Secure with roofing nails.
- For metal sheets, measure and cut to size, then attach with roofing screws.
Step 7: Final Assembly and Placement
- Check Stability:
- Ensure all parts of the dog house are securely attached and stable. Double-check that the structure is level.
- Place the Dog House:
- Choose a location for the dog house that provides some shade and protection from the elements. Ensure the ground is level and consider placing the dog house on a platform or bricks to keep it off the damp ground.
Step 8: Personalize and Make Comfortable
- Add Bedding:
- Place a comfortable dog bed or blankets inside the house to create a cozy space for your pet.
- Personal Touches:
- Add your dog’s name or other decorative elements to personalize the dog house.
- Introduce Your Dog:
- Allow your dog to explore and get comfortable with their new house. Encourage them with treats and positive reinforcement.
Maintenance Tips
- Regular Cleaning:
- Keep the dog house clean by removing bedding and cleaning the interior regularly. This helps prevent pests and maintains a healthy environment for your pet.
- Inspect for Damage:
- Periodically check for any signs of wear or damage, such as loose screws or cracks in the wood. Repair as needed to ensure the dog house remains safe and sturdy.
- Weather Protection:
- Apply a fresh coat of paint or stain every couple of years to protect the wood from weather damage.
Conclusion: How to Make a Big Wood Dog House
Building a big wood dog house is a practical and enjoyable project that can enhance your dog’s comfort and well-being. By following these steps and using quality materials, you can create a durable and stylish shelter that your dog will love. Whether for protection from the elements or a cozy retreat, a well-built dog house is a worthwhile investment for any pet owner. Enjoy the process and the satisfaction of creating something special for your furry friend!
I hope this article on How to Make a Big Wood Dog House has been helpful. If you have any further questions, please feel free to leave a comment below.
Video
