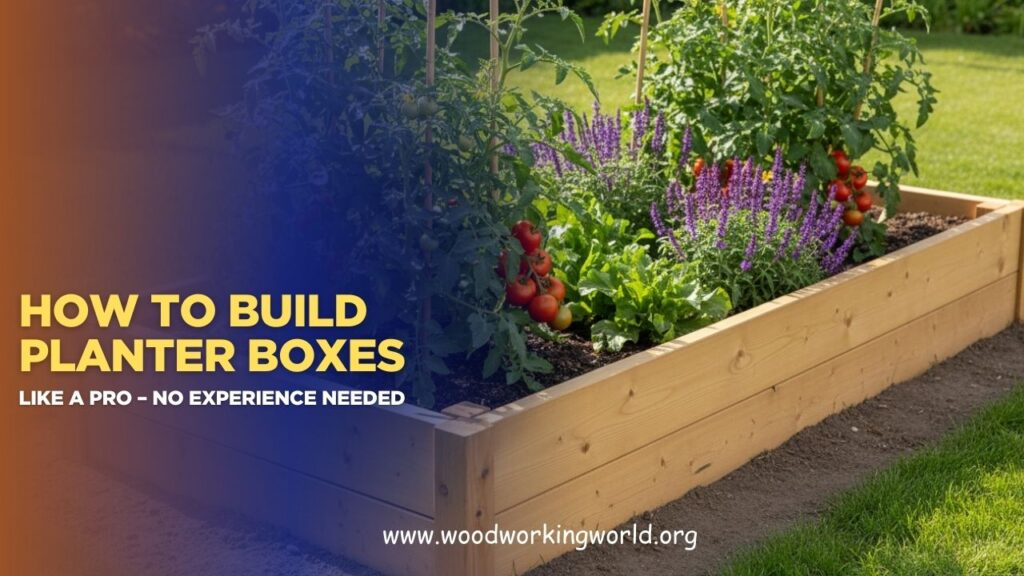
How to Build Planter Boxes Like a Pro – No Experience Needed (Updated 2026)
Dreaming of beautiful planter boxes but not sure where to start? Good news — you don’t need woodworking experience or fancy tools to build strong, stylish planter boxes that look professionally made. Whether you want to upgrade your garden, decorate your patio, or add charm to your home’s entryway, learning this simple skill can transform any outdoor space.
In this guide, you’ll discover exactly how to build planter boxes like a pro, with easy-to-follow steps, beginner-friendly tips, and smart tricks that guarantee great results. If you’re ready to create eye-catching planters without the frustration, you’re in the right place.
👉 CLICK HERE to Unlock 16,000+ DIY woodworking plans now
Why Build Your Own Planter Boxes?
Building your own planter boxes offers numerous benefits:
- Customization: Tailor the size, shape, and design to perfectly fit your space.
- Cost-Effective: Save money compared to buying pre-made planter boxes.
- Satisfaction: Enjoy the sense of accomplishment that comes with creating something beautiful with your own hands.
- Environmentally Friendly: Use sustainable or reclaimed materials to reduce waste.
Now that you know why building your own planter boxes is a great idea, let’s dive into how to get started.
👉 CLICK HERE to Unlock 16,000+ DIY woodworking plans now
Materials and Tools You’ll Need
To build a basic planter box, gather the following materials and tools:
Materials:
- Wooden boards (cedar, redwood, or pressure-treated lumber)
- Galvanized screws or nails
- Wood glue (optional for extra stability)
- Landscape fabric
- Potting soil
- Plants or seeds
- Exterior wood sealant (optional for longevity)
Tools:
- Measuring tape
- Saw (circular saw or hand saw)
- Drill with screwdriver bit
- Sandpaper or electric sander
- Clamps (optional)
- Paintbrush (if sealing or painting)
Pro Tip: Cedar and redwood are naturally rot-resistant and ideal for outdoor use.

Step-by-Step Guide to Building Your Planter Box
Follow these simple steps to build your own planter box.
Step 1: Plan and Measure
Decide on the size and shape of your planter box. Consider where you’ll place it and the types of plants you’ll grow.
- Standard dimensions: A typical planter box might be 36 inches long, 12 inches wide, and 12 inches tall.
- Sketch your design and note all measurements.
Step 2: Cut the Wood
Measure and mark your wood according to your design.
- Cut two boards for the long sides, two for the short sides, and one for the bottom.
- Use sandpaper to smooth any rough edges.
Step 3: Assemble the Box
- Lay out the pieces on a flat surface.
- Attach the short sides to the long sides using screws and a drill.
- Secure the bottom board to the frame.
Tip: Use clamps to hold the wood in place while screwing for more precision.
Step 4: Reinforce and Seal
- Apply wood glue along the joints for added stability (optional).
- Seal the wood with exterior wood sealant to protect against moisture.
- Allow the sealant to dry completely.
Step 5: Add Drainage
- Drill several small holes in the bottom of the box for drainage.
- Line the inside with landscape fabric to prevent soil from escaping.


Step 6: Fill and Plant
- Add a layer of gravel or small rocks for better drainage.
- Fill the box with potting soil, leaving about an inch of space from the top.
- Plant your flowers, vegetables, or herbs.
Table: Recommended Planting Depths for Common Plants
| Plant Type | Recommended Planting Depth |
|---|---|
| Herbs | 6-8 inches |
| Flowers | 8-10 inches |
| Leafy Greens | 10-12 inches |
| Root Vegetables | 12-18 inches |
| Shrubs/Small Trees | 18-24 inches |
Tips for Success
Here are some additional tips to ensure your planter box project is a success:
- Measure Twice, Cut Once: Double-check your measurements before cutting to avoid mistakes.
- Use Weather-Resistant Materials: Protect your planter box from the elements by using treated wood or applying a weatherproof sealant.
- Mind the Drainage: Proper drainage is essential to prevent root rot.
- Choose the Right Plants: Consider sunlight, temperature, and soil requirements when selecting plants.
Creative Design Ideas
- Painted Planter Boxes: Add a splash of color to your garden by painting your planter boxes.
- Vertical Planters: Save space by building tiered or wall-mounted planter boxes.
- Wheel-Mounted Planters: Add wheels for easy mobility.
- Reclaimed Wood: Use pallet wood or other recycled materials for a rustic look.
Quote: “Gardening adds years to your life and life to your years.” – Unknown
👉 CLICK HERE to Unlock 16,000+ DIY woodworking plans now
FAQs
1. What type of wood is best for planter boxes?
Cedar and redwood are ideal because they are naturally rot-resistant. Pressure-treated wood is also an option but may contain chemicals that can leach into the soil.
2. How do I protect my planter box from rotting?
Apply an exterior wood sealant and ensure proper drainage by drilling holes in the bottom of the box.
3. Can I use indoor wood for outdoor planter boxes?
It’s not recommended. Indoor wood is not designed to withstand moisture and will degrade quickly when exposed to the elements.
4. How deep should a planter box be?
The depth depends on the plants you’re growing. Most plants thrive in 10-12 inches of soil, but deeper boxes are needed for root vegetables and shrubs.
5. Do I need to line my planter box?
Yes, lining with landscape fabric helps prevent soil from escaping and protects the wood from moisture.
6. How often should I water plants in a planter box?
Watering frequency depends on the climate, season, and plant type. Check the soil moisture regularly and water when the top inch of soil feels dry.
7. Can I build a planter box without power tools?
Yes! While power tools make the job easier, you can use hand tools like a hand saw and screwdriver.
Conclusion
Building your own planter boxes is a rewarding and straightforward project that anyone can accomplish. By following this step-by-step guide, even beginners can create beautiful, functional planter boxes to enhance their outdoor space. So grab your tools, get creative, and enjoy the satisfaction of building something with your own hands. Happy gardening!
👉 CLICK HERE to Unlock 16,000+ DIY woodworking plans now
