Enhance your garden with a stylish rectangle wood planter! Discover design ideas, DIY tips & the best picks. Click to transform your outdoor space today!
Gardens have always been a serene space to unwind and enjoy the beauty of nature. A well-designed garden can become a sanctuary, a place to reconnect with nature, and even a statement piece for your home. Among the myriad ways to enhance your garden, adding planters is a simple yet effective solution. Planters are not only functional but also act as beautiful design elements that can elevate the overall aesthetic of your outdoor space. One of the most popular and timeless choices is the rectangle wood planter. This versatile piece can complement any garden, from contemporary urban spaces to rustic countryside gardens.

In this article, we will delve into the benefits, features, and step-by-step guide to creating and using a rectangle wood planter for your garden. We’ll also compare different wood materials, highlight useful tips, and provide answers to common questions. Whether you’re a DIY enthusiast or someone simply looking for ideas to refresh your garden decor, this article will guide you through everything you need to know.
Why Choose a Rectangle Wood Planter?
Before diving into the step-by-step process of making or choosing a rectangle wood planter, it’s important to understand why this style is so popular. Here are a few reasons why rectangle wood planters are a great choice for your garden:
- Aesthetic Appeal
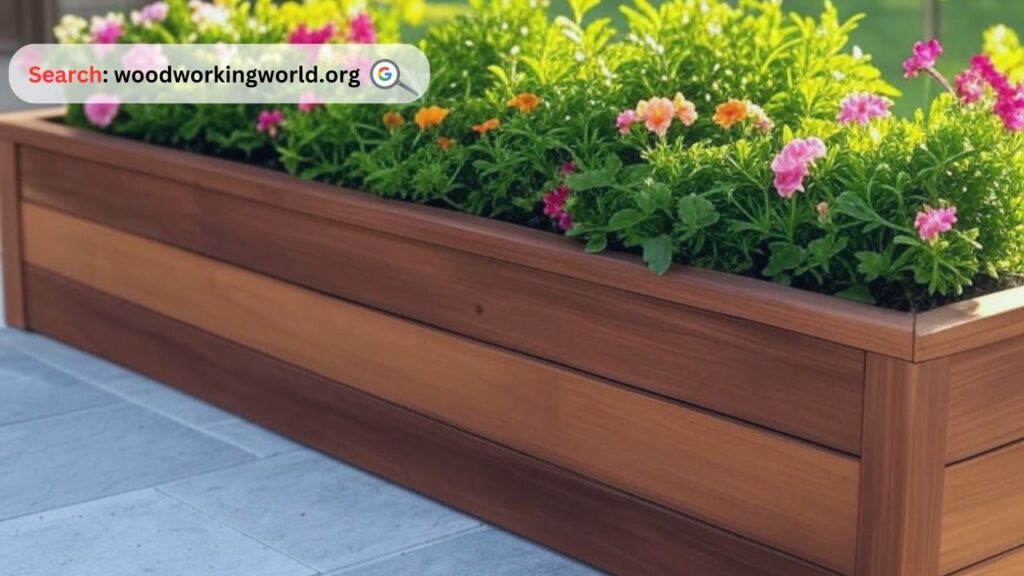
The clean lines and natural look of a wooden rectangle planter blend well with virtually every style of garden decor. Whether you prefer a rustic, modern, or traditional garden, a wooden planter will add an organic touch, enhancing the overall ambiance. - Functional Design
Rectangular planters provide ample space for your plants. Their shape is not only space-efficient but also ideal for growing long or sprawling plants like herbs, flowers, or even small vegetables. - Durability
Wood is a durable material, especially if treated properly. With the right care, a wooden rectangle planter can withstand harsh weather conditions, including rain, snow, and sun. - Sustainability
Many gardeners opt for wood because it is a renewable resource, making it an eco-friendly choice compared to plastic or metal planters. Plus, you can always repurpose and recycle wooden planters when they eventually wear out. - Versatility
A rectangle wood planter can be used in a variety of ways, including as a standalone piece, as part of a garden wall, or in a raised bed configuration. Its versatility makes it a popular choice for many gardeners.
👉 Build 16,000+ Projects with Step-by-Step Plans—No Big Workshop or Costly Tools Needed! Start Now!
Step-by-Step Guide to Building a Rectangle Wood Planter
Building your own rectangle wood planter is a rewarding project that doesn’t require advanced skills, yet the result can be spectacular. Here’s how you can create your own wooden planter step by step.
Materials You’ll Need:
- Wooden planks (cedar, redwood, or pine are popular choices)
- Wood screws
- Power drill with screwdriver bit
- Measuring tape
- Saw (circular saw or hand saw)
- Sandpaper
- Wood sealant or stain (optional for extra protection)
- Wood glue (optional)
- Landscape fabric (to prevent soil from escaping)
- Stapler or staple gun
Step 1: Measure and Cut the Wood
Start by deciding the dimensions of your rectangle planter. A typical size might be 24 inches long, 12 inches wide, and 12 inches deep, but you can adjust these based on your available space or specific plant needs. Use a measuring tape and saw to cut the wood into the following pieces:
- Two pieces for the length (e.g., 24 inches)
- Two pieces for the width (e.g., 12 inches)
- One piece for the bottom (cut to the dimensions of your base, such as 24 x 12 inches)
- Optional: Additional corner posts for reinforcement if you want a more robust structure.
Step 2: Sand the Wood
Sanding your wood is an essential step to ensure a smooth surface, free of rough edges that could splinter over time. Use medium-grit sandpaper and go over all edges and surfaces of the cut pieces.
Step 3: Assemble the Sides
Start by aligning the four side pieces (two long and two short) to form a rectangle. Apply wood glue along the edges where the pieces will meet, then secure them with screws. Drill pilot holes first to avoid splitting the wood, then screw the pieces together. Repeat this process for both the long sides and the short sides.
Step 4: Attach the Bottom
Once the sides are assembled, place the bottom piece on the rectangle frame. Secure it using screws, ensuring the bottom piece is aligned and flush with the edges of the side walls. If you’d like additional support, you can add corner posts or brackets.
Step 5: Apply Finish or Sealant (Optional)
To protect the wood from the elements and increase its longevity, apply a coat of wood sealant or outdoor wood stain. This step will help prevent the wood from rotting and ensure it maintains its natural beauty over time.
Step 6: Line the Planter (Optional)
To prevent soil from leaking out of the planter and to protect the wood from moisture, line the inside with landscape fabric. Cut a piece of fabric large enough to cover the sides and bottom of the planter. Staple the fabric to the inside of the planter.
Step 7: Fill with Soil and Plant
Now that your wooden planter is complete, fill it with soil and plant your favorite flowers, herbs, or vegetables. Be sure to select plants that are suitable for the planter’s size and your garden’s climate.
Expert tips on Woodworking 🌿📦 Watch now!

Comparison Table: Types of Wood for Planters
When it comes to choosing the best wood for your rectangle wood planter, the type of wood you use can make a significant difference in both the aesthetic and durability of your planter. Below is a comparison table of the most popular types of wood for outdoor planters.
| Wood Type | Pros | Cons | Best For |
|---|---|---|---|
| Cedar | Naturally resistant to rot and insects, lightweight, beautiful aroma, eco-friendly | Can be expensive compared to other types of wood | High-end, long-lasting planters, modern rustic designs |
| Redwood | Long-lasting, resistant to decay, rich color | Expensive, can be difficult to find in certain areas | High-end planters, coastal or formal garden designs |
| Pine | Affordable, widely available, easy to work with | Prone to rot if not treated, softer wood may dent or scratch | Budget-friendly planters, beginner projects, smaller planters |
| Teak | Extremely durable, resistant to weather and insects | Expensive, heavier than other types of wood | Luxury planters, tropical or Mediterranean garden designs |
| Cypress | Rot-resistant, moderately priced, sustainable | Less durable than cedar or redwood | Affordable, eco-friendly option for outdoor planters |
| Pressure-Treated Lumber | Affordable, easy to find, resistant to termites | Contains chemicals that may leach into soil if untreated | Budget-friendly planters for vegetable or flower gardens |
Useful Tips for Maintaining Your Rectangle Wood Planter
- Drainage: Always ensure your planter has proper drainage. Drill small holes in the bottom of the planter to prevent waterlogging, which could damage both the plants and the wood.
- Placement: Keep your planter in an area that gets the appropriate amount of sunlight for the plants you choose to grow. Consider the shade tolerance of the plants if placing them in direct sunlight.
- Seasonal Care: During the winter months, move the planter to a sheltered area to protect it from freezing temperatures, or ensure it is sealed well to withstand harsh weather.
FAQ Section
Q1: Can I use a rectangle wood planter for vegetables?
A1: Yes, a rectangle wood planter is a great option for growing vegetables. Just make sure the planter is deep enough for the roots of the vegetables you plan to grow, and ensure there is proper drainage.
Q2: How do I prevent my wooden planter from rotting?
A2: To prevent rot, use a wood that is naturally resistant to moisture, such as cedar or redwood. Apply a protective sealant or stain to the wood, and ensure that the planter has proper drainage.
Q3: Can I use recycled wood to make a planter?
A3: Absolutely! Recycled wood can be an eco-friendly and cost-effective option for making a planter. Just be sure the wood is still structurally sound and free of pests.
Q4: How long will a wooden rectangle planter last?
A4: The lifespan of a wooden rectangle planter depends on the type of wood used and how well it is maintained. With proper care and treatment, it can last anywhere from 3 to 10 years.
Q5: What plants are best for a rectangle wood planter?
A5: Many plants thrive in rectangle wood planters, including flowers, herbs, and vegetables. Consider plants with shallow roots for smaller planters and root-heavy plants for larger planters.
Q6: Can I paint or stain my wooden planter?
A6: Yes, you can paint or stain your wooden planter to match your garden’s aesthetic. Be sure to use outdoor-grade paint or stain to ensure it withstands the elements.
Conclusion
Adding a rectangle wood planter to your garden is a simple yet effective way to enhance its beauty and functionality. Whether you’re crafting your own or purchasing a pre-made one, this timeless addition offers both aesthetic appeal and practical benefits. With proper care, your wooden planter will not only house thriving plants but also serve as an elegant garden feature for years to come. Happy gardening!
👉 Click To Order Teds Woodworking With A 60-Money-back Guarantee From – Official Website