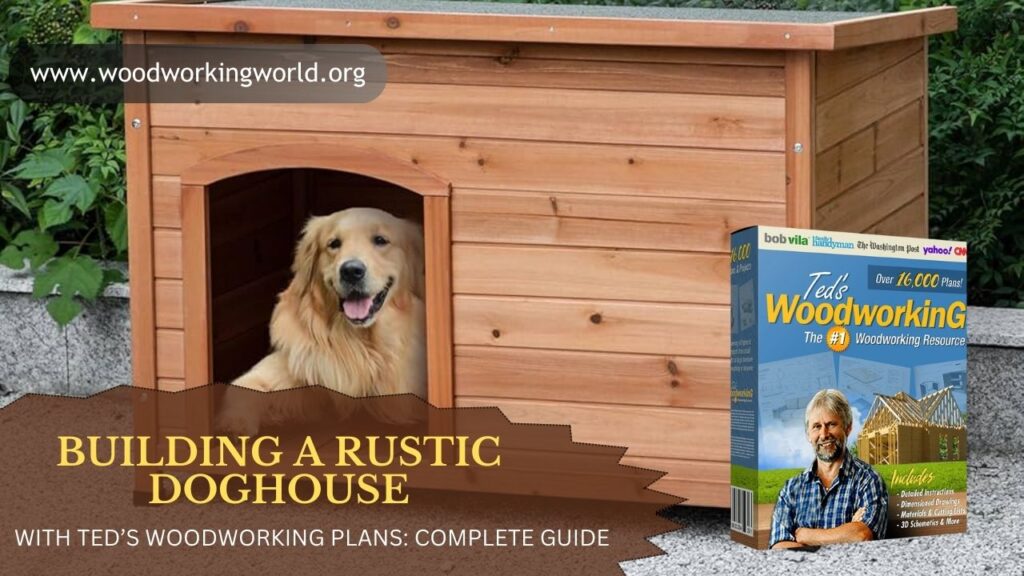
Building a Rustic Doghouse with Ted’s Woodworking Plans: Complete Guide
If you’re a pet parent, you know your dog deserves more than just love and treats — they deserve a safe, comfortable place to rest outdoors. A doghouse provides shelter from sun, rain, and wind while giving your furry friend a cozy space of their own. Instead of buying a generic, flimsy doghouse from the store, why not build one yourself?
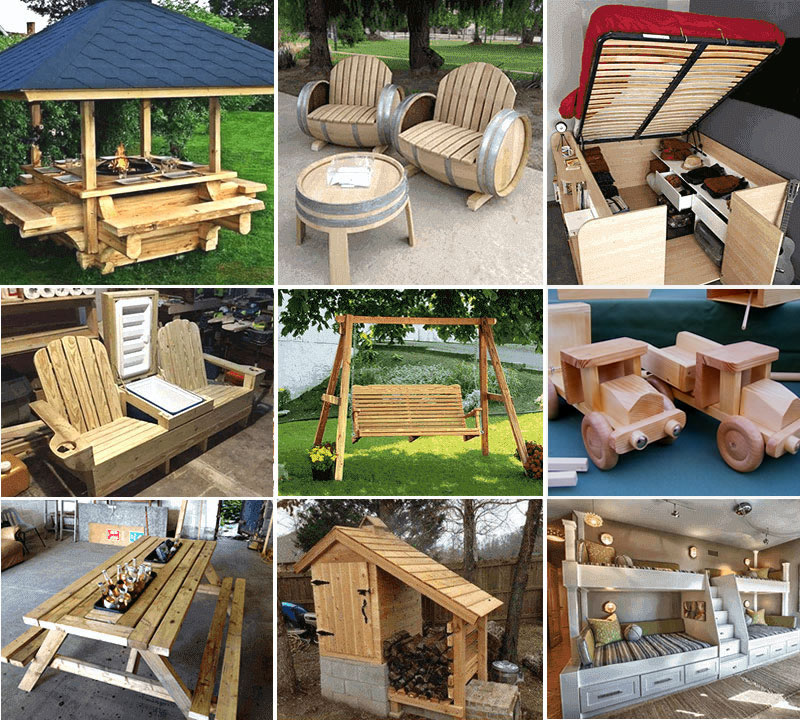
With Ted’s Woodworking Plans, creating a rustic doghouse is not only possible but surprisingly beginner-friendly. Ted’s library of 16,000+ woodworking blueprints includes multiple doghouse designs — from simple square shelters to stylish rustic cabins — with clear instructions and material lists that make the process easy for anyone, even first-time builders.
👉 Want instant access to doghouse plans ? Click here to get Ted’s Woodworking Plans.
Why Build a Doghouse Instead of Buying One?
Before diving into the build, let’s quickly cover why DIY is the better choice:
- Customization – Store-bought doghouses come in one-size-fits-all models, but your dog deserves a shelter that fits their size perfectly.
- Quality – Many pre-made houses use thin plywood or plastic that won’t withstand harsh weather. Building one lets you choose sturdy lumber.
- Style – A rustic design blends with your yard’s aesthetic instead of looking cheap or out of place.
- Cost-effective – Materials for a DIY build are often cheaper than buying a premium house.
- Satisfaction – You get the joy of creating something functional with your own hands.
Choosing the Right Rustic Doghouse Design
Ted’s Woodworking Plans offer several rustic doghouse styles, including:
- Basic pitched-roof doghouse – Simple, beginner-friendly, classic A-frame look.
- Cabin-style doghouse – Looks like a miniature log cabin, great for rustic yards.
- Large-breed house – More spacious with reinforced structure.
- Insulated versions – Perfect for colder climates.
For this guide, we’ll focus on a medium-sized pitched-roof rustic doghouse that works for most breeds (35–70 lbs) and is easy to modify for smaller or larger dogs.
👉 Want instant access to doghouse plans ? Click here to get Ted’s Woodworking Plans.
Materials You’ll Need
One advantage of Ted’s plans is the complete materials list for each project. Here’s a typical list for a medium rustic doghouse:
Lumber & Panels:
- 2 sheets of exterior-grade plywood (½” thick)
- 2×4 boards (for framing, about 6 pieces, 8’ long)
- Cedar or treated pine planks (for rustic siding look)
- 1 piece of plywood or metal sheet for roofing
Hardware & Supplies:
- Exterior wood screws (1 ½” and 2 ½”)
- Wood glue (weather-resistant)
- Hinges (if making a removable roof for cleaning)
- Outdoor wood sealant or paint
- Roofing shingles (optional, for extra durability)
Tools:
- Circular saw or jigsaw
- Power drill
- Measuring tape
- Carpenter’s square
- Clamps
- Sandpaper or orbital sander
- Paintbrush/roller
Step-by-Step: Building the Rustic Doghouse
Let’s get into the fun part — building!
Step 1: Measure Your Dog
Your doghouse should be sized for comfort. A good rule:
- Width & length = Dog’s length (nose to tail) + 12 inches.
- Height = Dog’s height (floor to head) + 9 inches.
- Door opening = About ¾ of your dog’s shoulder height.
For a medium dog, this means a doghouse roughly 36” long x 24” wide x 28” high, with a door opening around 12” x 18”.
Step 2: Build the Base Frame
- Cut 2×4 boards into two 36” and two 24” pieces.
- Assemble into a rectangle using screws and glue.
- Attach plywood on top to form the floor.
- For outdoor use, elevate the base on small blocks or bricks to prevent moisture damage.
Step 3: Build the Side Walls
- Cut two plywood panels, each 28” tall x 24” wide.
- Frame the edges with 2x4s for sturdiness.
- For a rustic look, attach cedar planks horizontally across the panels.
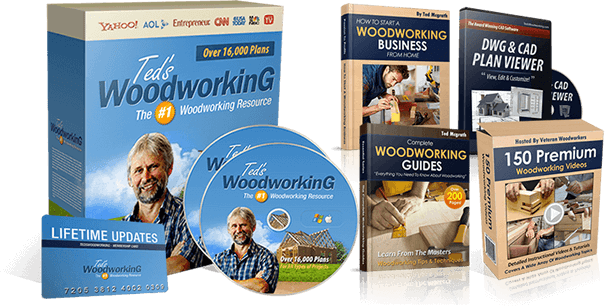
🛠️ Ted’s 16,000 Woodworking Plans – Why You’ll Love It:
- 📚 16,000+ Ready-to-Build Projects – From small crafts to big furniture!
- ✂️ Step-by-Step Instructions – No guesswork, just follow and build.
- 🧰 Perfect for All Levels – Beginner to expert, everyone’s covered.
- 💰 Turn Projects into Profit – Build & sell your creations easily!
- 🔥 Limited-Time Deal – Grab it now at 90% OFF!

Step 4: Add the Front & Back Panels
- Cut two plywood panels, each 36” wide x 28” tall, with a triangular peak for the pitched roof.
- Cut the door opening into the front panel.
- Frame the doorway with 2x2s for strength.
- Attach both panels to the base frame with screws.
Step 5: Assemble the Structure
- Attach the side walls to the base first.
- Then screw the front and back panels into place, forming a rectangular box with a peaked top.
- Double-check for squareness before tightening screws fully.
Step 6: Build and Attach the Roof
- Cut two plywood panels, each 20” x 40”, for the roof sides.
- Join them at an angle to form a pitched roof.
- Secure with screws or hinges (hinged roofs make cleaning easier).
- Optionally, add shingles for weatherproofing.
Step 7: Sand and Finish
- Sand all rough edges, especially around the door opening, to keep your pup safe.
- Apply outdoor sealant, stain, or paint for weather resistance.
- For a rustic look, use a natural stain (like walnut or cedar) instead of paint.
Step 8: Add Optional Comfort Features
- Insulation (foam panels between walls).
- A removable floor panel for easy cleaning.
- Porch overhang for shade.
- Personalized nameplate for your dog.
👉 Want instant access to doghouse plans ? Click here to get Ted’s Woodworking Plans.
How Long Will It Take?
For beginners, expect around 6–8 hours total spread over 1–2 days:
- Measuring and cutting: 2–3 hours
- Assembling walls and base: 2 hours
- Roof construction: 1–2 hours
- Sanding and finishing: 2 hours
Cost Breakdown
One of the biggest perks of DIY is cost savings.
- Lumber & plywood: \$70–\$120
- Screws, glue, hardware: \$20–\$40
- Finish & sealant: \$20–\$30
- Shingles (optional): \$30–\$50
Total cost: \$110–\$200 (depending on size & finish)
Compare that to pre-built rustic doghouses, which can run \$300–\$600+.
Common Mistakes to Avoid
- Door too big – Heat escapes easily; keep it smaller than you think.
- Skipping sealant – Moisture ruins untreated wood fast.
- No ventilation – Add small gaps near the roof for airflow.
- Uneven cuts – Leads to gaps and weak joints; measure twice, cut once.
Ted’s Woodworking Plans help prevent these errors by giving precise diagrams and cutting lists.
Why Use Ted’s Woodworking for This Project?
While you could wing it with a rough sketch, Ted’s Plans give you:
- Exact measurements – No guessing or wasted wood.
- Step-by-step guides – Perfect for beginners.
- Material lists – Know exactly what to buy before starting.
- Design variations – Choose from multiple rustic styles.
- Scalability – Adjust sizes for small or large dogs easily.
That’s why DIYers find Ted’s Plans so valuable: less frustration, more results.
The Bottom Line
Building a rustic doghouse isn’t just about saving money — it’s about giving your dog a sturdy, personalized shelter and enjoying the satisfaction of a completed project.
With Ted’s Woodworking Plans, the process becomes simple, guided, and fun. In just a weekend, you can create a cozy outdoor home that matches your yard’s style and keeps your furry friend happy for years.
👉 Want instant access to doghouse plans ? Click here to get Ted’s Woodworking Plans.