Wood Jewelry Box Plans: DIY Your Perfect Handmade Keepsake
Looking to build your own wood jewelry box? Whether you’re a hobbyist woodworker or a DIY enthusiast, wood jewelry box plans offer a step-by-step path to crafting a timeless and personalized piece. These plans help you turn simple lumber into an elegant box to store cherished items—all while honing your woodworking skills.
In this guide, we’ll walk you through the best wood jewelry box plans, what to look for in a good plan, essential tools and materials, and helpful tips for a successful build.

Why Use Wood Jewelry Box Plans?
Using detailed plans saves time, reduces waste, and improves results. Whether you’re making a gift or organizing your collection, plans give structure to creativity.
Benefits of Woodworking with Jewelry Box Plans
- Precision and consistency
- Less material waste
- Beginner-friendly instructions
- Opportunities to customize design and finish
Key Takeaway: Well-designed wood jewelry box plans help streamline the project and produce beautiful, functional results—even for beginners.
What to Look for in Quality Wood Jewelry Box Plans
Not all plans are created equal. Look for these features:
Clear, Illustrated Instructions
Visual guides like 3D diagrams or step-by-step photos make a big difference.
Dimensions and Cut List
Plans should include:
- Full dimensions of each part
- A cutting list for easy lumber prep
- Material type recommendations (e.g., oak, walnut, maple)
Skill Level Indicator
Know whether the plan suits your ability:
- Beginner – Simple boxes with minimal joinery
- Intermediate – Features like drawers, dividers, or curved lids
- Advanced – Dovetail joints, hidden compartments, or inlay work
🛠️ Ted’s 16,000 Woodworking Plans – Why You’ll Love It:
- 📚 16,000+ Ready-to-Build Projects – From small crafts to big furniture!
- ✂️ Step-by-Step Instructions – No guesswork, just follow and build.
- 🧰 Perfect for All Levels – Beginner to expert, everyone’s covered.
- 💰 Turn Projects into Profit – Build & sell your creations easily!
- 🔥 Limited-Time Deal – Grab it now at 90% OFF!

Top Free and Premium Sources for Wood Jewelry Box Plans
Free Plan Resources
- Wood Magazine – Offers clear, tested plans for all skill levels
- Instructables – DIY plans submitted by community members with photos
- Ana White – Excellent beginner-friendly woodworking projects
Premium Plan Sources
- Etsy – PDF blueprints from independent woodworkers
- Fine Woodworking – Detailed plans with premium joinery techniques
Tools and Materials Needed
Before starting your wood jewelry box, gather the basics:
Tools:
- Miter saw or table saw
- Clamps
- Sandpaper or orbital sander
- Wood glue
- Router (optional for edge detail)
Materials:
- Hardwood boards (e.g., cherry, maple, walnut)
- Lining material (felt, velvet)
- Hinges and small hardware
- Non-toxic wood finish
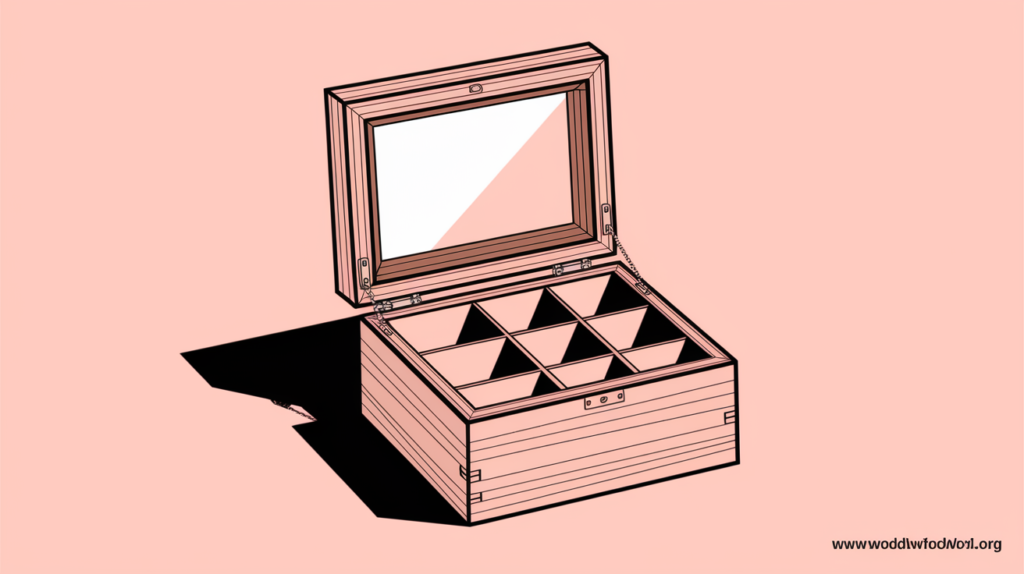
Design Features to Consider
Interior Organization
Add compartments for rings, earrings, or watches.
Aesthetic Enhancements
Consider:
- Decorative veneer or inlay
- Routed edges
- Personalized engraving
Pro Tips for Building a Wood Jewelry Box
- Test cuts on scrap wood before final assembly
- Use soft-close hinges for a smooth opening experience
- Apply finish before installing the lining
- Let glue dry fully before sanding or staining
Internal Link Suggestion
Looking for a ready-made gift? Explore our handmade wooden jewelry box collection for artisan-crafted options.
External Link Suggestion
For more woodworking fundamentals, check out the Fine Woodworking Basics Guide—a high-authority resource trusted by professionals.
Conclusion: Bring Craftsmanship to Life
With the right wood jewelry box plans, you can turn simple lumber into a meaningful, elegant creation. From beginner blueprints to expert designs, these plans give you everything you need to build something beautiful, functional, and long-lasting.
Ready to start your next project?
Download a set of beginner-friendly wood jewelry box plans today and enjoy the satisfaction of making something by hand—crafted with care and built to last.