What Is a Coped Joint? A Complete Guide to Perfect Trim and Molding Corners
If you’ve ever installed trim or molding, you know that getting clean, gap-free corners can be one of the trickiest parts of the job. That’s where a coped joint comes in—an essential carpentry technique that helps you achieve tight, professional-looking inside corners that stay seamless over time. Unlike simple miter cuts that can open up as walls shift or expand, a properly cut coped joint creates a precise fit that looks flawless and lasts longer.
In this complete guide, you’ll learn what a coped joint is, why it’s superior for trim and molding corners, how it works, and the tools you need to create one. Whether you’re a DIY beginner or a seasoned carpenter, this guide will help you master the technique and get perfect corners every single time.
👉 CLICK HERE to Unlock 16,000+ DIY woodworking plans now
What Is a Coped Joint?
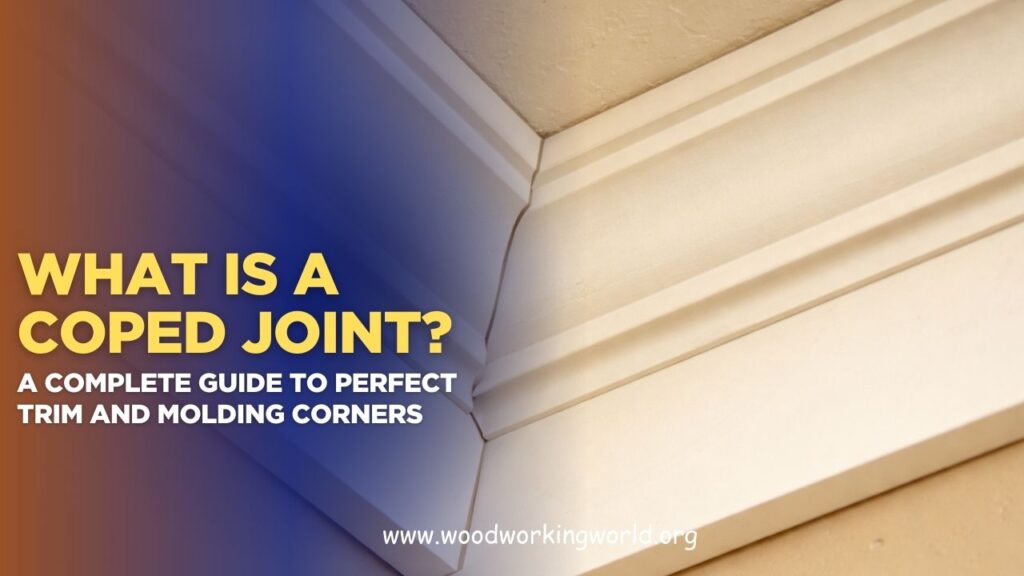
A coped joint is a woodworking technique used to connect two pieces of trim, especially at inside corners. Instead of cutting both boards at a 45° angle (as in a miter joint), one board is cut square, and the other is “coped” to fit its profile perfectly.
This creates a tight, seamless fit—even when walls aren’t perfectly square (which is more common than you’d think!).
👉 CLICK HERE to Unlock 16,000+ DIY woodworking plans now
Why Use a Coped Joint Instead of a Miter Joint?
While miter joints might seem easier, they often leave unsightly gaps due to uneven walls, humidity changes, or wood expansion. A coped joint, on the other hand, locks the trim together, offering:
✅ A snug fit, even on crooked walls
✅ Greater strength and durability
✅ A polished, professional finish
✅ Less visible seams
Want joints that don’t crack over time or come apart with temperature shifts? Coping is the solution.
Where Are Coped Joints Commonly Used?
You’ll find coped joints in nearly every pro-level trim job, including:
- Crown molding
- Baseboards
- Chair rails
- Picture rails
- Panel molding
These joints are ideal for interior corners, where seamless transitions are essential for a high-end look.
Tools You Need to Make a Coped Joint
To get started, you’ll need just a few simple tools:
🪚 Miter saw – For the initial 45° cut
🪚 Coping saw – To follow the trim’s profile
🪓 File or rasp – For smoothing the cut
📐 Combination square – To mark straight lines
🪛 Sandpaper or sanding block – For touch-ups
Tip: Ted’s Woodworking Plans include tool guides and safety tips so you’ll always know which tool to use and how to use it safely.
Step-by-Step: How to Cut a Coped Joint
Here’s how to make a clean, professional coped joint—no gaps, no guesswork.
Step 1: Cut the First Board Square
Place your first piece of trim against the wall and cut it with a 90° square edge. Nail it into position.
Step 2: Miter the Second Board
Use a miter saw to cut the second piece at a 45° angle, revealing the trim profile.
Step 3: Cope the Profile
With a coping saw, carefully cut along the exposed edge of the miter. Think of this like tracing the trim’s shape and carving it out.
Step 4: Smooth the Edges
Use a file or sandpaper to refine the edge for a perfect fit.
Step 5: Test the Fit
Dry-fit the piece against the first board. It should nest tightly. If needed, make slight adjustments.
Step 6: Install the Trim
Once you’re happy with the fit, nail the coped piece in place. Done!


Pro Tips for Perfect Coped Joints
🔧 Use scrap wood to practice your coping cuts
📏 Work slowly, especially around curves
🪚 Let the coping saw do the work—don’t force it
🪓 File the back slightly (called back-cutting) to make the joint fit tighter in front
🧰 Use wood filler only for hairline gaps—good coping should need almost none
Common Mistakes to Avoid
❌ Rushing the cut
❌ Not securing the board while cutting
❌ Skipping the sanding step
❌ Trying to cope intricate profiles without practice
With Ted’s Woodworking Plans, you’ll get diagrams, step-by-step guides, and cut templates so you avoid these beginner mistakes and start building with confidence.
How Ted’s Woodworking Makes It Even Easier
Ted McGrath’s massive package of 16,000+ woodworking plans includes detailed guides for trim, molding, cabinetry, and DIY furniture—many of which require coped joints for a clean finish.
✅ Easy-to-follow instructions
✅ Cut lists and materials
✅ Tool recommendations
✅ Video tutorials (for visual learners)
✅ Perfect for beginners and pros alike
Whether you’re installing baseboards or building your own picture frame or cabinet, these plans remove the guesswork and boost your skills.
Why Coped Joints Still Matter Today
Coped joints aren’t just for old-school carpenters. Even with modern tools, this traditional joint:
- Delivers a cleaner, more stable finish
- Handles humidity and shifting walls better
- Shows you care about craftsmanship
- Impresses clients or buyers with tight, gap-free results
With today’s focus on DIY, renting, and home renovation, knowing how to cope trim properly gives your work a professional edge.
Want to Learn More Woodworking Techniques Like This?
If you found this helpful, just imagine what you can create with access to over 16,000 expert-level woodworking plans.
From crown molding to custom furniture, Ted’s Woodworking teaches you how to:
🔨 Build projects that actually fit
🧰 Use the right tools for the job
📏 Cut with precision, even on curved walls
📦 Save time and materials
💸 Save money on pro installation fees
👉 CLICK HERE to Unlock 16,000+ DIY woodworking plans now
Final Thoughts: Is a Coped Joint Worth It?
Absolutely. A coped joint is the secret to seamless corners, clean lines, and a polished finish that miter joints just can’t guarantee—especially in older homes or rental properties with uneven walls.
With a little practice and the right guidance (like what you’ll find in Ted’s Woodworking), you’ll go from beginner to pro in no time.
👉 CLICK HERE to Unlock 16,000+ DIY woodworking plans now
