How to Build a Tall Corner Plant Stand: Elevate Your Greenery
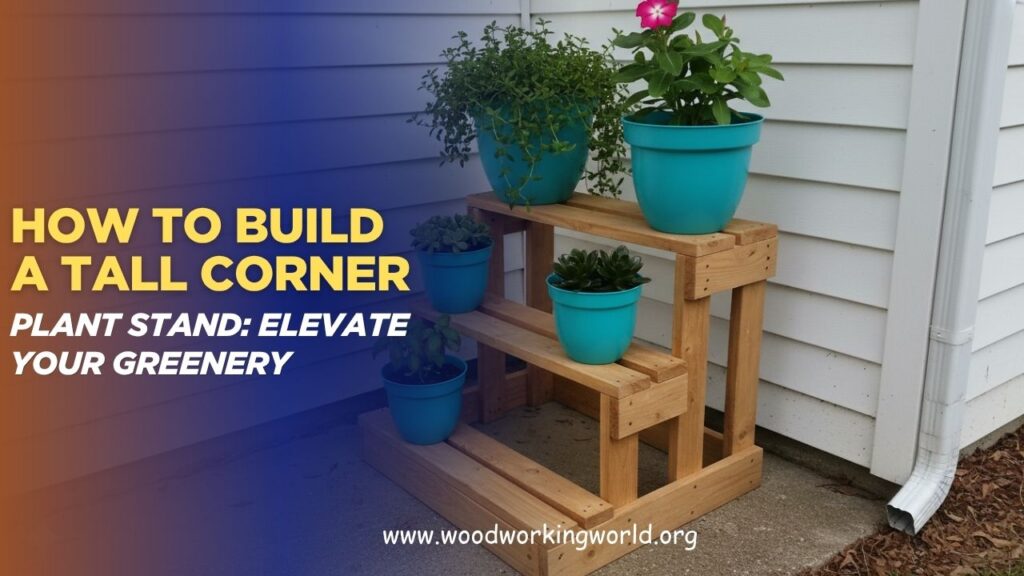
Elevate your indoor or outdoor décor by learning how to build a tall corner plant stand that maximizes space while showcasing your greenery in style. A vertical plant stand is perfect for small rooms, empty corners, or anyone looking to add height and visual interest to their plant display.
In this guide, you’ll discover how to design and build a sturdy, space-saving plant stand using simple materials and beginner-friendly techniques—helping you turn any corner into a lush, eye-catching feature.
👉 CLICK HERE to Unlock 16,000+ DIY woodworking plans now
Why Build a Tall Corner Plant Stand?
Corner plant stands are popular for several reasons:
- Space-saving: Perfect for small rooms or apartments, using underutilized corner space.
- Aesthetic appeal: Elevates plants at different heights for a dynamic and visually appealing display.
- Customizable: Build to match your décor, plant size, and personal style.
- Beginner-friendly: A relatively simple woodworking project that teaches measuring, cutting, and assembly.
By building your own, you can tailor dimensions, finish, and style to fit your home perfectly.
👉 CLICK HERE to Unlock 16,000+ DIY woodworking plans now
Step 1: Plan Your Plant Stand
Before cutting any wood, decide on the size, tiers, and style of your plant stand. Typical design features include:
- Height: 36–60 inches (91–152 cm) for tall stands
- Number of tiers: 3–5 levels, spaced evenly
- Width of shelves: 10–14 inches (25–36 cm)
- Depth: 10–12 inches (25–30 cm) per shelf for stability
- Corner fit: Triangular or quarter-circle shape to maximize corner use
Pro Tip: Sketch your design on paper to visualize tier spacing and overall height before cutting wood.
Step 2: Gather Materials and Tools
Materials
- Wood boards (pine, oak, or plywood for shelves; 1×2 or 2x2s for frame)
- Wood screws or nails
- Wood glue (optional, for added stability)
- Sandpaper (medium and fine grit)
- Wood stain, paint, or sealant (for finish and protection)
- Optional: brackets for extra shelf support
Tools
- Circular saw, handsaw, or jigsaw
- Drill with drill bits
- Screwdriver or power drill
- Clamps for assembly
- Measuring tape and pencil
- Sanding block or orbital sander
Pro Tip: Use sturdy, solid wood for the shelves if you plan to place heavy pots.
Step 3: Cut the Wood
1. Shelves
- Cut triangular or quarter-circle shelves according to your plan.
- Sand edges smooth to avoid splinters.
2. Vertical Supports
- Cut four vertical posts (two for front corners, two for back corners if needed).
- Ensure all posts are equal in length for a level stand.
3. Optional Back Supports
- Cut additional support strips if you want a reinforced back for extra stability.
Pro Tip: Dry-fit pieces before assembly to ensure correct spacing and fit.
Step 4: Assemble the Frame
- Attach vertical posts:
- Secure posts with wood screws or brackets at the corners.
- Use clamps to hold in place while fastening.
- Install shelves:
- Start from the bottom shelf and work upward.
- Apply wood glue for extra stability, then fasten with screws.
- Ensure each shelf is level and spaced evenly.
- Optional reinforcement:
- Attach back supports diagonally or horizontally for added strength.
Pro Tip: Measure shelf spacing carefully so all plants fit comfortably and the stand is visually balanced.
🛠️ Ted’s 16,000 Woodworking Plans – Why You’ll Love It


Step 5: Sanding and Finishing
- Sand all surfaces and edges for smoothness.
- Fill knots or gaps with wood filler if desired.
- Apply stain, paint, or clear sealant to protect the wood from moisture and enhance appearance.
- Allow finish to dry completely before placing plants.
Pro Tip: Use a non-toxic finish if plants will be indoors, to avoid exposure to harmful chemicals.
Step 6: Placement and Styling
- Position the stand in a corner with adequate sunlight for your plants.
- Mix plants of different heights, colors, and textures for a dynamic display.
- Use decorative pots that complement your interior décor.
- Rotate plants occasionally to ensure even light exposure.
Pro Tip: Place heavier plants on the bottom shelves for stability and safety.
Maintenance Tips
- Dust shelves regularly to keep plants and wood clean.
- Inspect screws and brackets periodically and tighten if needed.
- Reapply protective finish as necessary to prevent wood from drying or warping.
- Avoid overwatering, which can damage wood or cause warping.
Pros and Cons of a Tall Corner Plant Stand
Pros
✔ Maximizes corner space
✔ Elevates plants for better display
✔ Customizable in size, shape, and finish
✔ Beginner-friendly woodworking project
✔ Adds aesthetic value to your home
Cons
❌ May wobble if not assembled securely
❌ Heavy plants can strain weaker shelves
❌ Requires careful measurement to fit tight corners
Common Mistakes to Avoid
❌ Using thin wood that can’t support heavy pots
❌ Uneven shelf spacing, leading to unstable display
❌ Skipping sanding or finishing, leaving rough edges
❌ Failing to secure vertical posts firmly
❌ Placing heavy plants on top shelves, risking tipping
FAQs: Tall Corner Plant Stands
1. Can I make this stand from pallet wood?
- Yes, untreated pallet wood works well, giving a rustic look. Just ensure boards are strong enough for weight.
2. How tall should a corner plant stand be?
- 36–60 inches (91–152 cm) is ideal for most rooms. Taller stands may require additional support.
3. How many shelves are recommended?
- 3–5 tiers are practical, depending on plant size and stand height.
4. Can it be used outdoors?
- Yes, if you use weather-resistant wood and apply outdoor sealant.
5. How do I prevent wobbling?
- Ensure vertical posts are straight and securely fastened; add cross-supports if needed.
👉 CLICK HERE to Unlock 16,000+ DIY woodworking plans now
Final Verdict: Elevate Your Plants with Style
Building a tall corner plant stand is a fun, practical, and beginner-friendly woodworking project. With careful planning, precise cuts, and proper assembly, you can create a beautiful and functional stand that maximizes your space and showcases your greenery.
Key Takeaways:
✔ Plan dimensions and shelf spacing before cutting
✔ Use sturdy wood for shelves and supports
✔ Assemble carefully with screws and glue for stability
✔ Sand and finish for smooth, safe, and attractive surfaces
✔ Position plants strategically, heavier on the bottom for balance
Pro Tip: Personalize your plant stand with decorative finishes, painted patterns, or unique pot arrangements to blend functionality with style, making it a striking focal point in your home.
👉 CLICK HERE to Unlock 16,000+ DIY woodworking plans now
