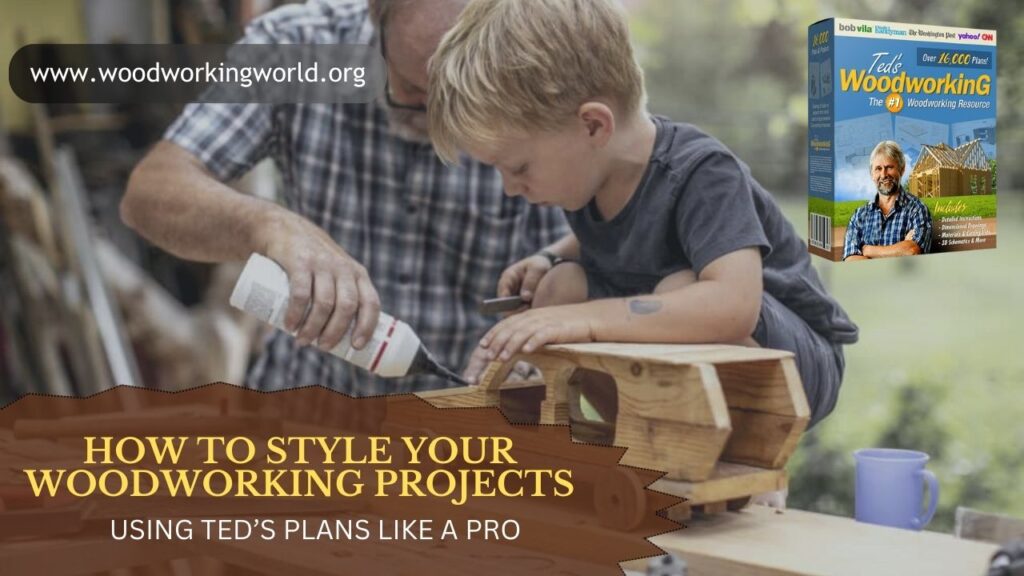
How to Style Your Woodworking Projects Using Ted’s Plans Like a Pro
Building furniture and DIY projects with your own hands is incredibly rewarding — but let’s be honest, it’s not just about functionality. The real magic happens when your projects don’t just work but also wow. That’s where styling comes in.
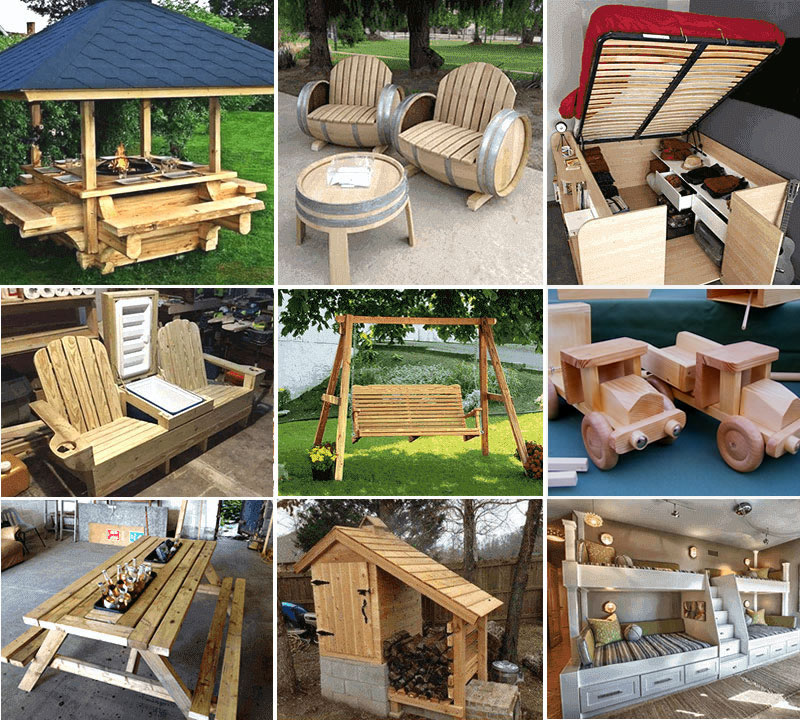
With Ted’s Woodworking Plans, you already have a massive advantage: over 16,000 detailed blueprints that cover everything from birdhouses to dining tables. Each plan provides step-by-step instructions and diagrams, so the construction part is clear. But if you want to take your woodworking from “nice DIY project” to “professional-quality furniture,” you need to think about styling, finishing, and presentation.
In this guide, we’ll dive deep into how to style your woodworking projects like a pro, using Ted’s plans as your foundation. We’ll cover finishes, color coordination, hardware choices, design tweaks, and tips to match your projects with your home décor.
👉 Want 16,000+ pro-level woodworking plans? Get Ted’s Woodworking Plans here.
Why Styling Matters in Woodworking
You might be thinking: “If I follow the plan, won’t it automatically look good?” Yes and no. The plan ensures structural integrity and proper design, but styling is what personalizes your project.
Here’s why styling matters:
- Adds Personality – Makes your project unique instead of cookie-cutter.
- Enhances Aesthetics – Elevates your build from “DIY” to “designer.”
- Matches Décor – Ensures the piece complements your room’s style.
- Boosts Value – Styled and finished projects look more professional, increasing resale potential.
Styling is the difference between “Oh, that’s cool you built that” and “Wow, where did you buy that?”
Step 1: Choose the Right Project for Your Space
The first step in styling is selecting a project that fits your home and personal style. Ted’s Woodworking library includes thousands of designs — rustic, modern, traditional, outdoor, and more.
✅ Ask yourself:
- Does this project complement my current décor (farmhouse, minimalist, industrial, etc.)?
- Do I need functionality (storage bench, desk) or a statement piece (coffee table, headboard)?
- How much time can I realistically commit to styling/finishing?
👉 Pro Tip: If you’re just starting, begin with a smaller, style-friendly project like a side table, bookshelf, or wall shelf. These pieces are easy to personalize without overwhelming you.
Step 2: Select the Right Wood Species
Wood choice has a huge impact on style. Different species have distinct colors, grains, and finishes.
- Pine – Affordable, light color, great for rustic or farmhouse looks.
- Oak – Strong, bold grain, excellent for traditional or classic styles.
- Maple – Smooth grain, works well for modern minimalist designs.
- Walnut – Dark, rich tones, perfect for luxury or mid-century pieces.
- Cedar – Naturally fragrant, excellent for outdoor projects.
✅ Match the wood type with your intended finish and room décor. Even if you’re on a budget, remember that stain can dramatically change appearance.
👉 Want 16,000+ pro-level woodworking plans? Get Ted’s Woodworking Plans here.
Step 3: Focus on Finishes
Styling often comes down to how you finish your project. The same plan can look rustic, modern, or elegant depending on stain, paint, or protective coats.
Popular Styling Finishes:
- Natural Finish – Clear coat to showcase the grain. Works best with high-quality woods like walnut or oak.
- Stained Finish – Adds depth and character. Great for rustic or vintage styles.
- Painted Finish – Clean, versatile, and customizable with any color. Perfect for farmhouse or contemporary pieces.
- Distressed Finish – Sanding edges and layering paints for a shabby-chic or antique look.
- Two-Tone Finish – Combining stain + paint for contrast (e.g., stained top with painted base).
👉 Pro Tip: Always test your finish on scrap wood before applying it to the final project. Wood grain can absorb stain differently than you expect.
Step 4: Hardware Makes the Difference
Hardware is like jewelry for furniture — small details that dramatically change style.
- Rustic Style – Wrought iron handles, black matte knobs, heavy hinges.
- Modern Style – Sleek stainless steel pulls, hidden hinges, minimal hardware.
- Vintage Style – Brass knobs, ornate handles, decorative hinges.
- Industrial Style – Exposed bolts, pipe legs, matte black brackets.
✅ Don’t skimp on hardware. Even an inexpensive build looks high-end with the right handles, hinges, and accents.
Step 5: Add Design Tweaks
One of the best things about Ted’s Woodworking Plans is flexibility. While the blueprints give exact measurements, you can tweak them to add personal flair.
- Change leg styles (straight, tapered, hairpin, turned).
- Add trim or molding for a more polished look.
- Swap out materials (replace a wooden tabletop with glass or tile inlays).
- Add decorative accents like routed edges or carved details.
Small changes can make your project look like a custom piece rather than a standard plan.
🛠️ Ted’s 16,000 Woodworking Plans – Why You’ll Love It:
- 📚 16,000+ Ready-to-Build Projects – From small crafts to big furniture!
- ✂️ Step-by-Step Instructions – No guesswork, just follow and build.
- 🧰 Perfect for All Levels – Beginner to expert, everyone’s covered.
- 💰 Turn Projects into Profit – Build & sell your creations easily!
- 🔥 Limited-Time Deal – Grab it now at 90% OFF!

Step 6: Match Projects with Room Décor
Styling doesn’t stop at the workshop — it continues in your home. Your project should complement the overall vibe of the room.
- Farmhouse Décor – White paint, distressed finishes, rustic hardware.
- Modern Décor – Sleek lines, neutral tones, minimal ornamentation.
- Industrial Décor – Raw wood, metal accents, darker finishes.
- Coastal Décor – Light woods, whitewashing, soft blue accents.
- Luxury Décor – Dark stains, glossy finishes, high-end hardware.
👉 Pro Tip: Create a mood board before finishing. Collect color swatches, wood samples, and inspiration photos to guide your styling decisions.
Step 7: Layer in Textures & Accessories
Styling isn’t just about the build — it’s about how you use it in your space. Accessorizing elevates your furniture even further.
- Add a throw blanket or cushions to a wooden bench.
- Use decorative baskets in a shelf or storage unit.
- Place a stylish tray and books on a coffee table.
- Incorporate plants or lighting to highlight wood tones.
These finishing touches bring your woodworking project to life.
Step 8: Protect Your Work
Finally, styling isn’t complete without durability. A piece that looks amazing won’t impress anyone if it scratches or warps in a few months.
✅ Always apply a protective coat:
- Polyurethane – Durable, available in matte to glossy finishes.
- Oil Finish – Brings out natural depth in the wood.
- Wax Finish – Soft luster, good for decorative pieces.
- Outdoor Sealants – Essential for garden furniture.
Protection ensures your project stays stylish for years.
Common Styling Mistakes to Avoid
Even with great plans, styling mistakes can ruin a project’s look. Here are pitfalls to watch out for:
- Skipping Sanding – Rough edges make even the best projects look amateurish.
- Using Cheap Hardware – Poor-quality knobs and handles cheapen the look.
- Overcomplicating Finishes – Too many layers or colors can look messy.
- Not Matching Décor – A modern table in a rustic room feels out of place.
- Ignoring Scale – A styled project that’s too big or too small throws off balance.
Avoid these mistakes, and your projects will look polished and professional.
👉 Want 16,000+ pro-level woodworking plans? Get Ted’s Woodworking Plans here.
Why Ted’s Woodworking Makes Styling Easier
Styling is easier when the construction is solid — and that’s what Ted’s Woodworking provides.
- Step-by-step instructions mean you spend less time troubleshooting and more time styling.
- 16,000+ plans ensure you’ll find a design that matches your preferred style.
- Clear dimensions and diagrams make customizing easy.
- Detailed material lists let you choose wood types and finishes confidently.
With Ted’s plans as your foundation, you can focus on the creative part: making your project beautiful and unique.
Final Verdict
Styling your woodworking projects is what transforms them from “functional builds” into “professional-quality furniture.” With Ted’s Woodworking Plans, you get the structural foundation — and by applying the right finishes, hardware, and design tweaks, you can make every piece look like it came from a designer showroom.
- Pick projects that fit your space and décor.
- Choose the right wood and finishes.
- Elevate with hardware and accessories.
- Match the final piece to your home’s style.
The end result? Projects that don’t just work but truly wow.
👉 Want 16,000+ pro-level woodworking plans? Get Ted’s Woodworking Plans here.